|
|||||||
Member's Build-Up Forum If you're building up your FJ, share it with us here. Minor to major, showcase your build here!
Ollie's "BugEater" BuildThis is a discussion on Ollie's "BugEater" Build within the Member's Build-Up Forum forums, part of the FJ Cruiser General Discussion category! |
 Similar Threads
|
||||
| Thread | Thread Starter | Forum | Replies | Last Post |
| KMC XD Series 20" on FJ Cruiser | BIRDMAN | Wheels and Tires | 21 | 06-26-2011 06:23 PM |
| New "My FJ" profile tab created | BIRDMAN | Site News | 2 | 02-02-2011 10:39 PM |
 |
|
|
LinkBack | Thread Tools | Display Modes |
|
|
#11 |
|
Full Access Member
|
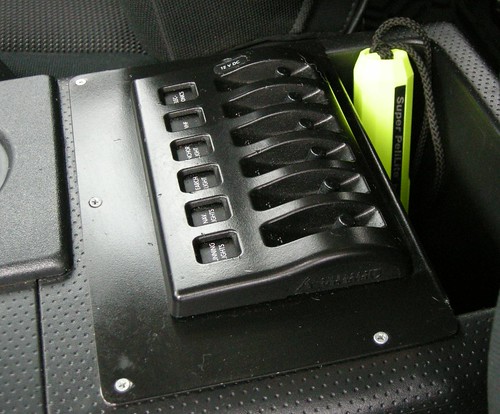
Center Console Stuff...
Accessory Switches (GPSMap 498, DVD Player, etc.)  Lighting Switch Gear (Each switch has a built in fuse):  Master Arm Switches (Horn, Compressor, and Winch): Note: The FJ horn works in normal mode with the master switch off. When I arm the master switch the FJ horn triggers both the air horns and the regular horn.  This is a shot of Center Console: 
|
|
|

|
|
|
#12 |
|
Full Access Member
|
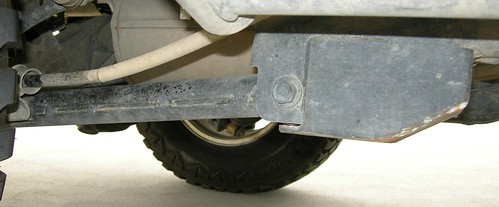
O&B Fab Lower Control Arm Bracket Armor & O&B Fab Reinforced Factory Lower Control Arms:
 All-Pro Front Skid Plate:  All-Pro Tranny Skid:  O&B Fab Swaybar Collars: 
|
|
|

|
|
|
#13 |
|
Full Access Member
|
Safari Snorkel:
 10lb CO2 System & Fire Extinguisher:  Air Horn Set-Up (7 Trumpets Total): Note: If I arm them before getting setting the alarm, they will go off with the alarm system. 
|
|
|

|
|
|
#14 |
|
Full Access Member
|
Industrial EMT Med Kit:
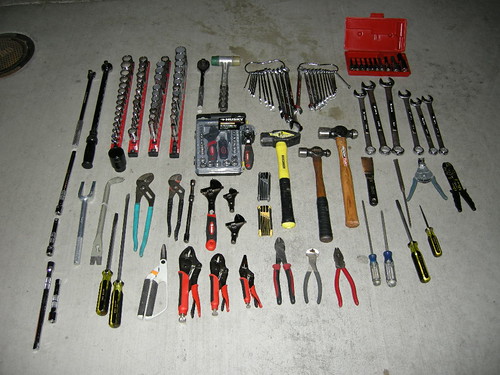
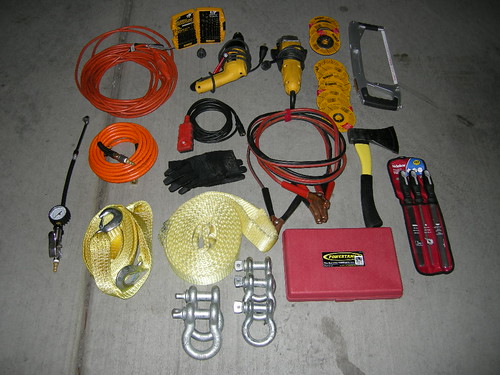
 Daily Emergency Load Out (All this gear fits in my cargo box/area):   
|
|
|

|
|
|
#15 |
|
Full Access Member
|
Every rig needs a 72 hour Bug-Out-Bag
   
|
|
|

|
|
|
#16 |
|
Full Access Member
|
Got tired of my sliders in my OEM roof rack and decided to make my own platform. Items used, 1/2" dia all-thread, Nylock nuts and fender washers, 3/8" air hose, 1/8" SS expanded metal, and 1/2" conduit clamps. Will paint the outer nuts black when I get the time.
   
|
|
|

|
|
|
#17 |
|
Full Access Member
|
I have had a RAM laptop mount in my rig for a few years now. I started out with a Panasonic Toughbook then migrated to an HP Pavilion dv3 laptop. The laptop mount tray for the RAM mount is bulky and cumbersome. The mount sets over the passenger seat so it is a pain to have passengers on board when you picot the setup over the center console you are banging your hand around on the bottom of it. If you raise it high enough for everything to clear underneath then the laptop blocks the drivers view out the passenger side windshield when the laptop is open. Additionally, when the laptop is clamped up in the RAM tray, the clamps block a lot of the plugs and disc drive access on the HP computer since everything is on the sides of the new computers.
Well, I fabricated a solution yesterday. I got my hands on a 1/4" thick piece of 12" x 12" fiberply board (fiberglass) and cut it down to 7" x 10". I removed the mounting ball from the bulky RAM mount tray and found a good location on the fiber board and marked the hole positions for the mount ball mounting holes. I drilled the holes and counter sunk the top side of the holes so the srewheads would be fluch. I then attached the mount ball to the board and layered the entire top of the board with the loop-side velcro. I layer the bottom side of my laptop, ensuring not to cover any vent holes, with hook-side velco. I now have a super strong holding lower profile laptop mount. I can get to everything on the sides of my laptop, It holds tighter than the RAM Mount tray, and I can now have passengers in my truck without much issue at all. If the velcro gets weak I will switch to dual lock tape. However, if I have to go that route I'm worried about not being able to remove my laptop. Old Laptop Mount Setup New Laptop Mount Setup |
|
|

|
|
|
#18 |
|
Full Access Member
|
There's a reason that I like various forums. If comments are constructive, you can get some good feedback. On a few of the sites I posted my RAM mount tray modification to people mentioned the vents on the computer not getting enough air. After examining the bottom of my computer more closely I realized that I did need to help my computer breathe better even though it's main vent is in the back. There are various vent areas on the bottom that the tray was covering. The air gets pulled in from the back then pushed through the computer out these other vents. So here's the mount tray after it's been modified for maximum breathablility for the computer. This set up will allow the the computer to breathe even better than when it's setting on a desk since the air will pass right through and not bounce off of a surface below the computer.
BEFORE: AFTER: |
|
|

|
|
|
#19 |
|
Full Access Member
|
A few years ago I replaced the factory stereo in the BugEater with a Clarion DVD stereo. I thought it would give me some better quality tunes with the aftermarket speakers I had already installed and the ability to watch some DVD's as well. It turned out that the sound quality sucked and I ended up buying an amplifier to help things out. The first picture below shows the Clarion and the second shows the amp and some Bose speakers I added.
The sound quality improved immensely. The stereo was still a pain though. It wouldn't read my Ipod correctly and often times wouldn't see the Ipod at all. So I returned it to exchange it. Well, even the second one gave me grief but I lived with it. One of the other issues with the stereo was the fact that it had no stereo Aux plug to hook other devices like my laptop to. Well the other day it finally took a dump on me. I have a stereo built into my Kobalt toolbox (and a Fridge) so I decided to hook that up in the BugEater. When I get more cash I'll replace the stereo in my toolbox. I installed the same model stereo that's in my Toolbox in my wife's 4-Runner a few years ago and we love it. The problem is that it is a single DIN stereo and the opening in the BugEater is for a 2 DIN stereo. So I had to fabricate a plate for the opening. Below are some pictures of the process. After all was installed and complete, I was very impressed with the sound quality of the stereo. I can watch DVD's on my laptop and there's still an extra Aux connection if I need it. The Ipod works flawlessly with this stereo too. Sometimes more money isn't the best option. Now I just need to give the BugEater a long over due cleaning. An additional bonus is that the blank area above the stereo affords the opportunity for more switches. |
|
|

|
|
|
#20 |
|
Super Moderator
Join Date: Feb 2011
Location: FL
Age: 42
Posts: 489
|
Dude... That thing is ricockulous!!! I love the compressors in the bumper, excellent idea. Your tool bag puts mine to shame, big time. I couldn't imagine driving that thing, looks like a jet cockpit! You have to have doubled the initial purchase price of your FJ by now. I like you axe mount too. Super simple, very nice! On the picture where your dashboard dimmer switch is, what is the button that I think was bluish that is a rocker style switch that says "up and down" on it?
|
|
|

|
 |
| Bookmarks |
«
Previous Thread
|
Next Thread
»
|
|
All times are GMT -4. The time now is 06:34 PM.


 Linear Mode


